Lägga till digitala produkter
Från din Websites + Marketing-onlinebutik kan du sälja både fysiska produkter som du skickar till kunder och digitala produkter, såsom nedladdningsbara dokument, videor eller ljudfiler.
Titta på videon nedan, som beskriver hur du lägger till produkter och produktbilder, samt priser, moms, betalningar och frakt för din onlinebutik. Följ sedan stegen längre ner för att lägga till digitala produkter i din onlinebutik.
- Gå till din GoDaddy- produktsida .
- Rulla ner, expandera Websites + Marketing och välj Hantera bredvid din webbplats.
- Expandera Butik på instrumentpanelen och välj Produkter .
- Välj Lägg till .
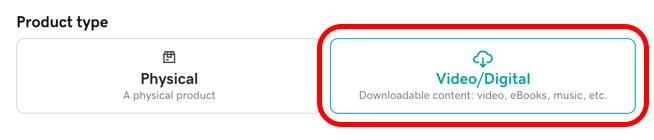
- Under Produkttyp väljer du Video / Digital .
- Lägg till en bild eller video-URL för att visa kunder vad de köper. Välj en bra grafik för att se till att de representerar din digitala produkt korrekt. OBS! Du kan lägga till upp till 10 bilder. Bilder måste vara i formatet .jpg, .jpeg, .jpe, .png, .gif, .webp eller .tiff och får inte överskrida 10 & nbsp; MB vardera. Bilderna kan vara upp till 5 000 x 5 000 pixlar men deras maximala bildskärm är 1 920 x 1 080 pixlar.
- Fyll i produktinformationen. Produktnamn och pris krävs, och du kan fylla i eventuella återstående fält vid behov:
- Försäljningspris : Visar försäljningspriset med det vanliga priset streckat över.
- Produktkategori : Lägger till produkten i en kategori du har skapat , t.ex. nedladdningsbara dokument, digitala kalkylblad eller onlinespel, så att kunderna lättare kan hitta den.
- Skattekategori : Välj den skattekategori som passar bäst för din produkt. Om det behövs kan du lägga till eller ändra skattesatserna .
- Synlig i min butik : Använd reglaget för att visa eller dölja produkten i din butik. Du kan ställa in det på Nej för att dölja säsongsvaror eller om du planerar att visa flera produkter samtidigt senare.
- Rulla neråt och använd flikarna för att lägga till mer information eller alternativ för din produkt.
- Beskrivning : Lägg till produktinformation manuellt eller välj Föreslå beskrivning för att få en automatisk genererad av artificiell intelligens (AI). Du kan ställa in tonen och längden på den automatiskt genererade beskrivningen och sedan kopiera eller återskapa texten genom att välja Visa mig ett annat utkast . När du är nöjd med resultatet väljer du Infoga .
Friskrivningsklausul: Undvik att ange känslig information när du använder AI-verktyg och granska alltid resultatet för noggrannhet.
OBS! Att ha minst en produktbild och en produkttitel hjälper AI att skapa en mer exakt beskrivning. - Nedladdningsbart innehåll : Välj Lägg till fil . När du har lagt till och döpt din produktfil väljer du Spara för att ladda upp den. OBS! Du kan ladda upp upp till 10 filer per produkt. Nästan alla filtyper är tillåtna (.mp3, .mp4, .m4a, .zip, .csv, .xls, etc.) och var och en får inte vara större än 2 GB. Din kund får en unik webbadress för varje fil och kan ladda ner filen upp till tre gånger.
- Sökmotorer: Lägger automatiskt till en direktlänk till den här produkten, som du kan redigera.
- Beskrivning : Lägg till produktinformation manuellt eller välj Föreslå beskrivning för att få en automatisk genererad av artificiell intelligens (AI). Du kan ställa in tonen och längden på den automatiskt genererade beskrivningen och sedan kopiera eller återskapa texten genom att välja Visa mig ett annat utkast . När du är nöjd med resultatet väljer du Infoga .
- När du är klar väljer du Spara eller väljer Spara och lägg till en till för att lägga till fler produkter. OBS! Du kan massöverföra upp till 100 produkter åt gången med en .csv-fil.
- Publicera din webbplats för att göra ändringarna live.
Relaterade steg
- Återställ nedladdningsgränsen för en digital produktbeställning
- Skicka om nedladdningslänken för en digital produkt